Learning a new framework is always a little strange at first.
You install a bunch of packages, the terminal spits out enough text to make you question your career choices, and suddenly you’re staring at files with names like page.tsx wondering what exactly you signed up for.
That’s where my latest project begins.
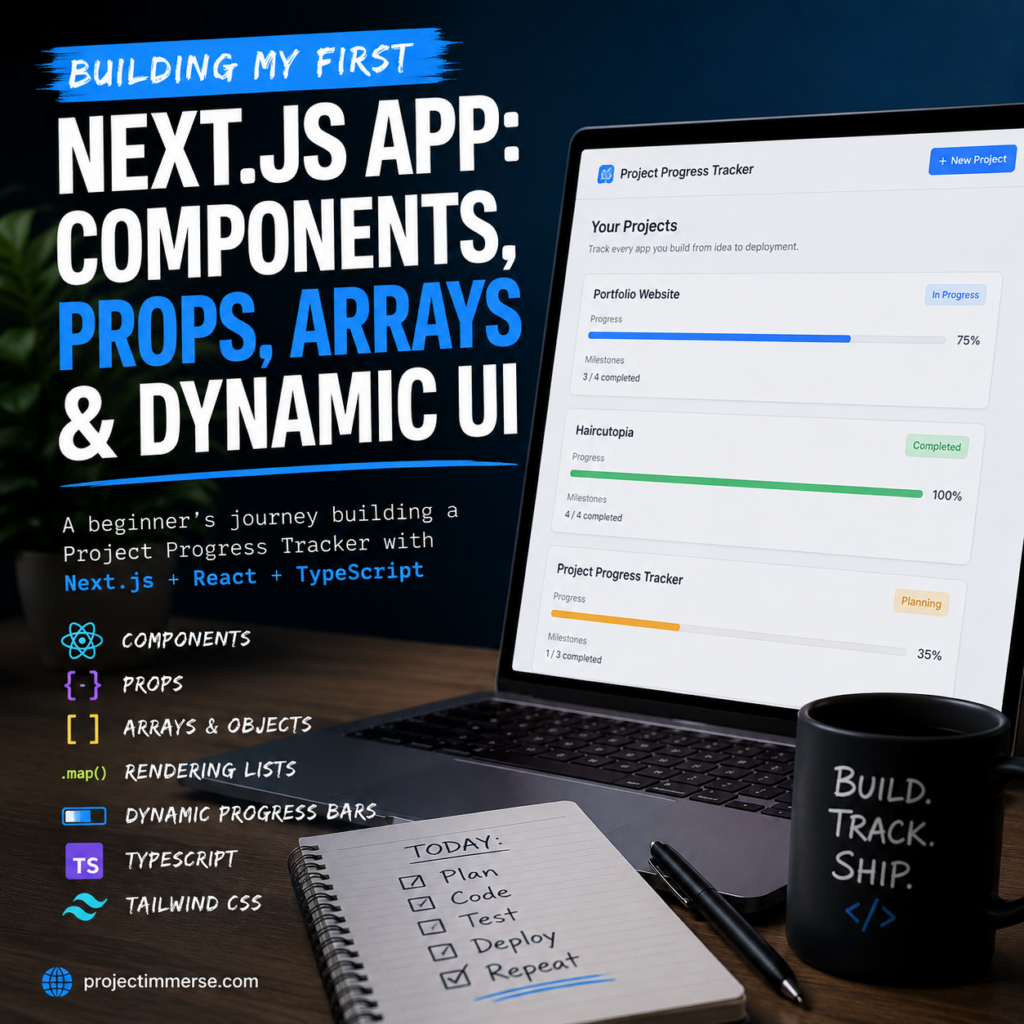
I’m building a simple Project Progress Tracker with Next.js. The idea is straightforward: create an application that tracks the other applications I build, including how far along each project is.
Yes, I’m building a project to track my projects. We’re officially through the looking glass.
More importantly, the app gives me a practical way to learn Next.js and React concepts instead of working through isolated examples that never turn into anything useful.
So far, I’ve covered components, props, TypeScript types, arrays, objects, .map(), JSX, Tailwind CSS, and dynamic progress bars.
Here’s what I’ve learned along the way.
Starting With Next.js
The project was created using create-next-app, which gives you the basic structure needed for a modern Next.js application.
One of the first important files is:
app/page.tsx
With the Next.js App Router, this file represents the application’s home page.
Visit:
localhost:3000
and Next.js renders the component exported from page.tsx.
My first version was intentionally simple:
export default function Home() {
  return (
    <main className="p-8">
      <h1 className="text-4xl font-bold">
        Project Progress Tracker
      </h1>

      <p className="mt-4 text-gray-600">
        Track every app you build from idea to deployment.
      </p>
    </main>
  );
}
There isn’t much happening yet, but even this small example introduces several important concepts.
The Home function is a React component.
The markup inside return is JSX.
And classes such as:
p-8
text-4xl
font-bold
mt-4
text-gray-600
come from Tailwind CSS.
At this stage, everything lived inside one component.
That works when an application contains approximately two sentences.
It becomes considerably less charming when the file reaches 900 lines.
That brings us to components.
Understanding React Components
One of the core ideas behind React is breaking an interface into smaller pieces called components.
Instead of putting the entire application inside page.tsx, I created:
components/Header.tsx
The component looks like this:
export default function Header() {
  return (
    <header className="mb-8">
      <h1 className="text-4xl font-bold">
        Project Progress Tracker
      </h1>

      <p className="mt-4 text-gray-600">
        Track every app you build from idea to deployment.
      </p>
    </header>
  );
}
A React component is essentially a JavaScript function that returns JSX.
But creating the file doesn’t automatically make it appear anywhere.
It needs to be imported and rendered.
Inside page.tsx:
import Header from "@/components/Header";
Then:
<Header />
The complete page becomes:
import Header from "@/components/Header";

export default function Home() {
  return (
    <main className="p-8">
      <Header />
    </main>
  );
}
The browser looks almost identical to before.
The underlying architecture, however, is better.
Instead of:
page.tsx
├── h1
└── p
I now have:
page.tsx
└── Header
    ├── h1
    └── p
That distinction becomes increasingly important as an application grows.
Components Don’t Run Just Because They Exist
This was an important concept to clarify.
Creating:
Header.tsx
doesn’t mean Next.js automatically discovers it and displays it.
The component has to be used somewhere.
The basic flow is:
Header.tsx
     ↓
export Header
     ↓
page.tsx
     ↓
import Header
     ↓
<Header />
     ↓
React renders the component
That helped make React components feel considerably less mysterious.
A component is essentially a function.
This:
<Header />
causes React to render what the Header component returns.
Once that clicked, building additional components made much more sense.
Creating a Project Card Component
The next component was the heart of the application:
components/ProjectCard.tsx
Initially, the project card was completely hardcoded:
export default function ProjectCard() {
  return (
    <div className="mt-8 rounded-lg border p-6">
      <h2 className="text-2xl font-semibold">
        Portfolio Website
      </h2>

      <p className="mt-2 text-gray-600">
        Progress: 75%
      </p>

      <p className="text-green-600">
        In Progress
      </p>
    </div>
  );
}
This worked.
Unfortunately, every project card would now be a 75%-complete portfolio website.
Unless I somehow decided to build twelve identical portfolio websites, this wasn’t going to scale.
That’s where props came in.
Understanding React Props
Props allow data to be passed into a component.
Instead of permanently storing:
Portfolio Website
75%
In Progress
inside the component, I can provide those values whenever I create a ProjectCard.
For example:
<ProjectCard
  title="Portfolio Website"
  progress={75}
  status="In Progress"
/>
And another:
<ProjectCard
  title="Tracker App"
  progress={100}
  status="Completed"
/>
Same component.
Different data.
This is one of the concepts that makes React reusable.
Adding TypeScript to the Props
Because the project uses TypeScript, the component also defines what type of data it’s expecting:
type ProjectCardProps = {
  title: string;
  progress: number;
  status: string;
};
This says:
titlemust be a stringprogressmust be a numberstatusmust be a string
The component can then receive those props:
export default function ProjectCard({
  title,
  progress,
  status,
}: ProjectCardProps) {
And display them:
<h2>{title}</h2>

<p>
  Progress: {progress}%
</p>

<p>
  {status}
</p>
The full component at this stage looked like:
type ProjectCardProps = {
  title: string;
  progress: number;
  status: string;
};

export default function ProjectCard({
  title,
  progress,
  status,
}: ProjectCardProps) {
  return (
    <div className="mt-8 rounded-lg border p-6 shadow">
      <h2 className="text-2xl font-semibold">
        {title}
      </h2>

      <p className="mt-2 text-gray-600">
        Progress: {progress}%
      </p>

      <p className="text-green-600">
        {status}
      </p>
    </div>
  );
}
Now the component doesn’t care what project it’s displaying.
It simply receives data and renders it.
Props Are Basically Function Arguments
One comparison helped make props easier to understand.
Consider a normal JavaScript function:
function greet(name) {
  return `Hello ${name}`;
}
Calling:
greet("Mark");
produces a different result than:
greet("Sarah");
The function stays the same.
The input changes.
React props follow the same basic idea.
Instead of:
greet("Mark");
we might have:
<ProjectCard title="Portfolio Website" />
The component is reusable because the data isn’t permanently baked into it.
Moving Project Data Into an Array
The next problem became obvious pretty quickly.
I could manually write:
<ProjectCard
  title="Portfolio Website"
  progress={75}
  status="In Progress"
/>

<ProjectCard
  title="Tracker App"
  progress={100}
  status="Completed"
/>
But imagine doing that for 30 projects.
Or 100.
At some point, copy and paste stops being a workflow and starts becoming a cry for help.
Instead, I moved the project information into an array:
const projects = [
  {
    title: "Portfolio Website",
    progress: 75,
    status: "In Progress",
  },
  {
    title: "Tracker App",
    progress: 100,
    status: "Completed",
  },
];
This introduced two fundamental JavaScript structures.
Arrays
The square brackets represent an array:
const projects = [];
An array is essentially a list of values.
Objects
Each project is represented by an object:
{
  title: "Portfolio Website",
  progress: 75,
  status: "In Progress",
}
That object groups related information together.
Instead of having separate variables for every title, percentage, and status, everything belonging to one project lives together.
Rendering Projects With .map()
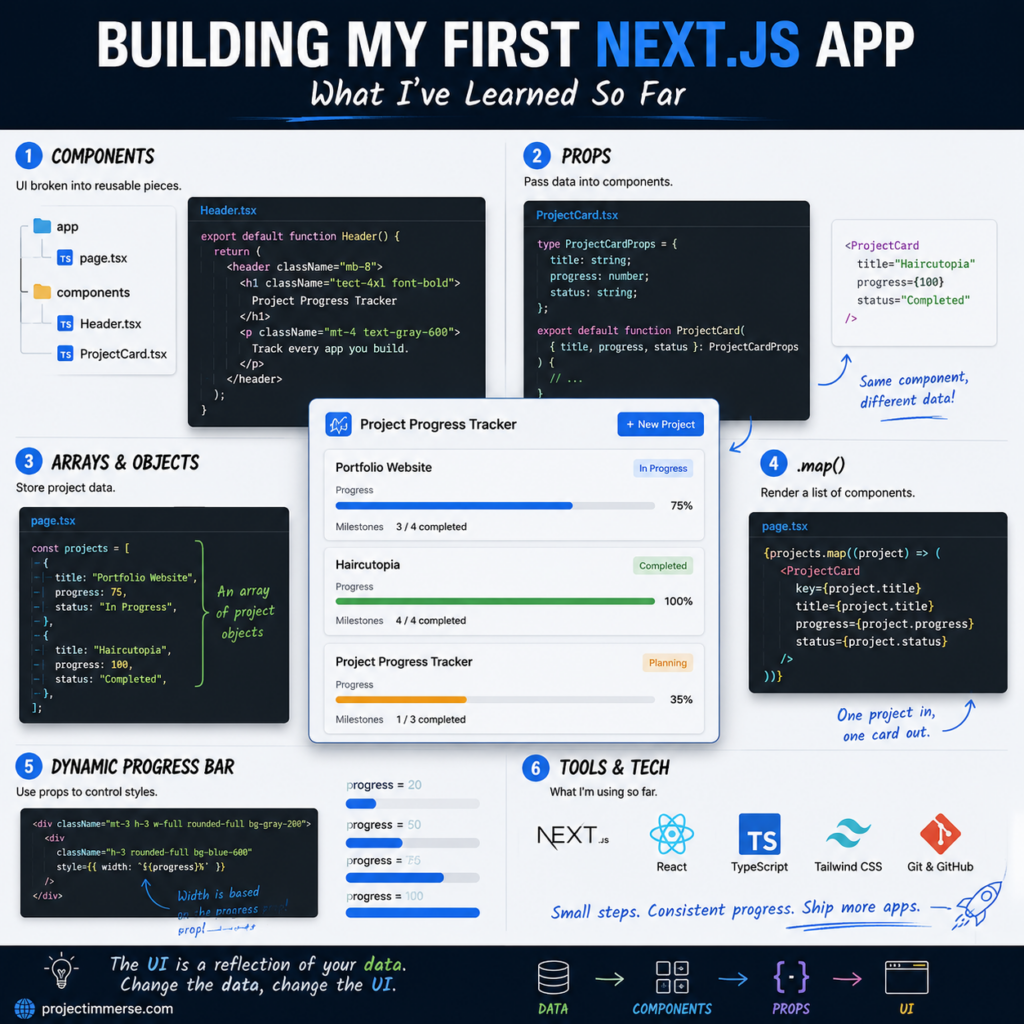
.map(), and dynamic data work together in the Next.js Project Progress Tracker.Once the projects were stored in an array, React could generate the cards automatically using .map():
{projects.map((project) => (
  <ProjectCard
    key={project.title}
    title={project.title}
    progress={project.progress}
    status={project.status}
  />
))}
Conceptually, this says:
For every project inside
projects, create aProjectCardusing that project’s information.
If there are two projects, React generates two cards.
If there are ten projects, React generates ten cards.
The component code doesn’t change.
Understanding project
Inside:
projects.map((project) => (
project represents whichever object .map() is currently processing.
During the first iteration:
project.title
might be:
Portfolio Website
During the next iteration, it might be:
Tracker App
React takes those values and passes them into ProjectCard.
That means:
title={project.title}
eventually becomes something equivalent to:
title="Portfolio Website"
for the first project.
Why React Needs a key
There’s also this:
key={project.title}
When React renders lists, it needs a unique identifier for each item.
The key helps React determine which item changed, was added, or was removed when the list updates.
Using the project title works for this early version because each title is unique.
Later, each project should have an actual ID:
{
  id: 1,
  title: "Portfolio Website",
  progress: 75,
}
Then I could use:
key={project.id}
which is a more reliable approach.
The Current page.tsx
At this stage, the home page looks like this:
import Header from "@/components/Header";
import ProjectCard from "@/components/ProjectCard";

const projects = [
  {
    title: "Portfolio Website",
    progress: 75,
    status: "In Progress",
  },
  {
    title: "Tracker App",
    progress: 100,
    status: "Completed",
  },
];

export default function Home() {
  return (
    <main className="max-w-4xl mx-auto p-8">
      <Header />

      {projects.map((project) => (
        <ProjectCard
          key={project.title}
          title={project.title}
          progress={project.progress}
          status={project.status}
        />
      ))}
    </main>
  );
}
It’s still a small application, but there’s already a meaningful separation between data and presentation.
The array contains the data.
ProjectCard determines how a project looks.
page.tsx puts everything together.
Adding Dynamic Progress Bars
The next improvement was visual.
Displaying:
Progress: 75%
works, but a project tracker should probably have an actual progress bar.
Inside ProjectCard, I added:
<div className="mt-3 h-3 w-full rounded-full bg-gray-200">
  <div
    className="h-3 rounded-full bg-blue-600"
    style={{ width: `${progress}%` }}
  />
</div>
The outer <div> creates the background track.
The inner <div> creates the filled portion.
The interesting part is:
style={{ width: `${progress}%` }}
If:
progress = 75
React effectively produces:
width: "75%"
If progress is 30, the bar becomes 30% wide.
If it’s 100, the entire bar fills.
Understanding the Double Curly Braces
At first:
style={{ width: `${progress}%` }}
looks like React has started communicating exclusively through punctuation.
There’s a reason for both sets of braces.
The outer braces:
style={ }
tell JSX that JavaScript is being used.
The inner braces:
{
  width: "75%"
}
represent a JavaScript object.
So:
style={{ width: `${progress}%` }}
means:
Set the
styleprop equal to a JavaScript object whosewidthproperty is based on the project’s progress.
Once broken apart, it’s much less intimidating.
Are the Percentages Actually Dynamic?
Sort of.
The progress bars are currently data-driven, but the underlying data is still hardcoded.
For example:
progress: 75
automatically controls both:
Progress: 75%
and the width of the progress bar.
Changing it to:
progress: 40
updates both parts of the interface.
That’s dynamic rendering.
However, I still have to edit the source code to change 75 to 40.
The application doesn’t yet allow the user to click something and change the percentage.
That requires another major React concept: state.
Static Data vs. React State
Right now the application works roughly like this:
projects array
      ↓
    .map()
      ↓
ProjectCard
      ↓
progress prop
      ↓
Progress bar
The next stage will look more like:
User completes milestone
          ↓
React state changes
          ↓
Progress recalculated
          ↓
Component re-renders
          ↓
Progress bar updates
That’s when the application will become genuinely interactive.
Eventually, I don’t want to manually specify:
progress: 75
at all.
Instead, the app should calculate progress based on completed milestones.
For example, if a project has four milestones:
✓ Planning
✓ Design
✓ Development
□ Deployment
then three out of four are complete:
3 / 4 = 75%
The application can calculate that automatically.
That will make the progress tracker actually track progress rather than politely displaying whatever number I typed into the source code.
Git and GitHub Along the Way
I also set up Git and pushed the project to GitHub.
This is something I wanted to incorporate from the beginning rather than waiting until the application was finished.
The basic workflow is:
git status
git add .
git commit -m "Describe the change"
git push
The first push used:
git push -u origin main
The -u option sets the upstream branch.
Essentially, it tells Git:
local main → origin/main
and asks it to remember that relationship.
After that, future pushes can simply use:
git push
It’s a small thing, but understanding what Git commands actually do feels considerably better than collecting terminal commands like mysterious incantations.
What I’ve Learned So Far
This relatively small application has already covered a surprising amount of ground.
I’ve worked with:
- Next.js App Router
page.tsx- JSX
- React function components
- Component imports and exports
- Props
- TypeScript prop types
- Destructuring
- JavaScript arrays
- JavaScript objects
.map()- React
keyprops - Tailwind CSS
- Dynamic inline styles
- Template literals
- Git
- GitHub
- SSH authentication
- Remote repositories
More importantly, these concepts aren’t being learned independently.
They’re starting to connect.
A project exists as an object.
Objects live inside an array.
.map() iterates over that array.
Each object gets passed into a reusable component through props.
Those props control what the component displays.
And changing the data changes the interface.
That’s starting to reveal the bigger React idea:
The UI is a representation of the application’s data.
What’s Next for the Project Progress Tracker?
The next major concept is React state with useState.
That’s where things should get considerably more interesting.
Instead of hardcoded project information, I want users to eventually be able to:
- Add a new project.
- Define milestones.
- Mark milestones as complete.
- Automatically calculate project completion percentages.
- Edit and delete projects.
- Filter active and completed projects.
- Save project information between browser sessions.
Eventually, the application can move beyond browser storage and use a real database and authentication system.
But there’s no reason to sprint there.
One thing I’ve already learned from working with Next.js is that understanding the small pieces pays off when they start working together.
Components aren’t particularly exciting by themselves.
Neither are props.
Neither is .map().
Put them together, though, and suddenly a small collection of JavaScript objects can generate an entire interface.
And once state enters the picture, those objects won’t just generate the interface—they’ll be able to change it.
That’s where I’m headed next.
Hopefully without breaking everything.
But this is software development, so no promises.